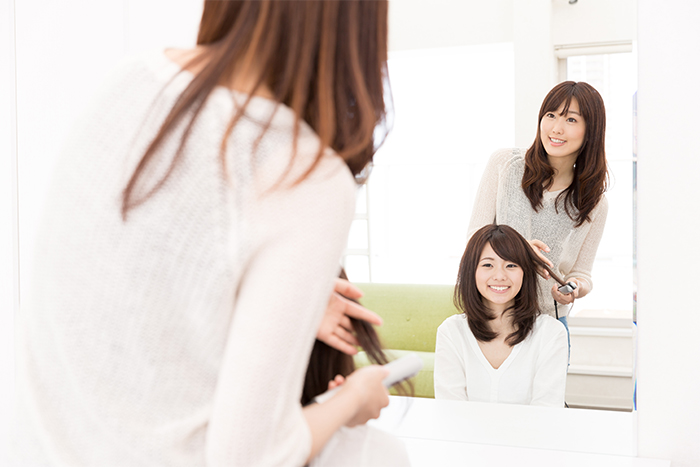
Few things in the world of beauty are tiny but dangerous, and it’s no surprise that hair dye is one of them.
With the power to (quite literally) make or break your hair, it’s no wonder trips to the salon are so expensive. A brilliantly-hued new hair colour can soothe all wounds, while a botched dye job is a disaster no one wants to deal with. But that doesn’t mean you should shy away from DIY-ing your next hair colour – think about all the time and money you can save plus that incredible feeling of accomplishment you’ll have when you’ve completed your at-home dye sesh!
But if you’ve coloured your hair on your own before, you know that it comes with a whole host of problems… Or it did until now. Daily Vanity has curated 11 common mistakes to avoid so you can confidently embark on your next DIY hair colour with no headaches and definitely no disasters!
1. Buying only one box of hair dye

Source: https://www.amazon.com/
The last thing you need while you’re knee-deep in gloves and covered in odd-smelling products is for you to run out of your hair dye.
If your hair is shoulder-length or longer, you may need up to two boxes for a well-pigmented colour depending on the thickness of your hair. Besides, don’t worry about over-purchasing – if you’re left over with an extra box, you can always save it for the next time you want to colour your hair at home again.
2. Picking a complicated colour

Forget about balayage or ombré colours for at-home colouring and keep it to shades that can show up on your natural hair. Anything more and you’ll run the risk of uneven colour and the possibility of a costly mistake that can only be fixed at a hair salon. If you’re really interested in highlights or other complex styles, we recommend leaving it to the professionals!
3. Having hair that’s too clean or too dirty

Most hair dyes are formulated to work better on hair that isn’t freshly washed, so it’s best not to cleanse your hair before you colour it. But that doesn’t mean you start your colouring on dirty and oily hair as dirt and debris will get in the way of an even coverage. Try to leave a 24-hour gap after washing your hair, before the dyeing process.
4. Not doing a patch test
While it’s easy to ignore the mini disclaimer about doing a patch test on your hair colour box, you could be putting your skin at risk. Give the new hair dye a little whirl by letting it sit on your skin for 48 hours, and if there’s no bad reaction, apply it all over your hair and scalp.
Okay, we know what you’re thinking “Why 48 hours?!”
This is because any sign of irritation usually appears within 48 hours of application and if you really want to play it safe and reduce the chances of allergies to the lowest, 48 hours will be the recommended amount of time for your patch test.

So what’s the best way to do it? Mix a small amount of the colour and apply it with a cotton swab to an inconspicuous part of your body, like the inside of your wrist. You can also apply it to a few strands of your hair or maybe a small area of your scalp. Wait for up to 48 hours to see how your skin and hair react. If it’s itchy, burning, or red, avoid that hair colour brand. More than a nice hair colour, it’s important to have a healthy scalp.
5. Using only your fingers for hair colour application

A common mistake for at home hair colouring is using only the fingers, resulting in uneven application and colour payoff. Use an application brush like the ones colourists at salons use – they’re usually pretty cheap at DIY home stores or Daiso! Gloves are definitely a given, to avoid staining your fingers. You’ll also need clips to section off parts of your hair as well as a second pair of eyes to help you with all the spots you’ve missed!
6. Doing it alone
Try as you might, it’s virtually impossible to have a great at-home hair colouring session on your own. Those hard to reach spots at the back of your head will be a pain unless you have a handy-dandy partner to help you with your hair-dyeing feat. Trust us, it’s better to bug a friend to help you than to deal with the repercussions of a hair-colour that looks like an accident!
7. Using metal clips, combs or bowls, when dye-ing hair

This one is an absolute no-no because any colour that contains a developer (a product mixed with the colour that activates it and allows it to penetrate your hair) will have a chemical reaction with metal. In extreme cases, this can lead to hair fall or damage and we definitely want to avoid that!
8. Using only one mirror

Source: https://www.aliexpress.com
Station yourself in front of a mirror and adjust the second mirror behind you so you can see the full view of your head at different angles. You might feel you’ve reached every single strand on your head even without two mirrors but seasoned DIY-hair colour users will know that there are some parts you will always end up missing unless you check it thoroughly with the help of mirrors
Alternatively, in the worst-case scenario where you can’t find someone to help you with colouring your hair, this is your next best bet!
9. Not applying a ‘fence’ to your hairline

Source: https://www.beautylish.com/
One of the most annoying discoveries to make after your DIY hair dyeing session is to find out that you’ve stained your forehead with the dye. Here’s the easiest way to avoid that situation – Create a barrier for your skin using either clear lip balm or petroleum jelly.
Simply trace the outlines of your hairline and sideburns. The oily consistency will prevent the hair dye from seeping onto your face and you can completely avoid a potential face disaster!
10. Using a sink to wash off the hair dye from your hair

Water from sinks are likely not to have enough pressure to completely rinse out all the potent chemicals from your scalp. Instead, use water from the shower head and spend a generous amount of time scrubbing and massaging your scalp so it’s squeaky clean. Think about why your professional hair colourist at the salon spends so much time rinsing your hair out right after a colouring session – it’s all for the sake of a healthy scalp!
11. Not applying conditioner

Skipping on conditioning your hair right after dye-ing it, will leave your cuticles open and that means the colour is still working on your strands – don’t be surprised if your hair colour appears much darker than what you wanted. Plenty of hair dye kits come with a conditioner but if you’re not comfortable with a different brand, use your own – and try to keep it to a deep-conditioner that’s coloured-hair friendly to maintain that perfect colour you’ve painstakingly worked on!